
The roles list
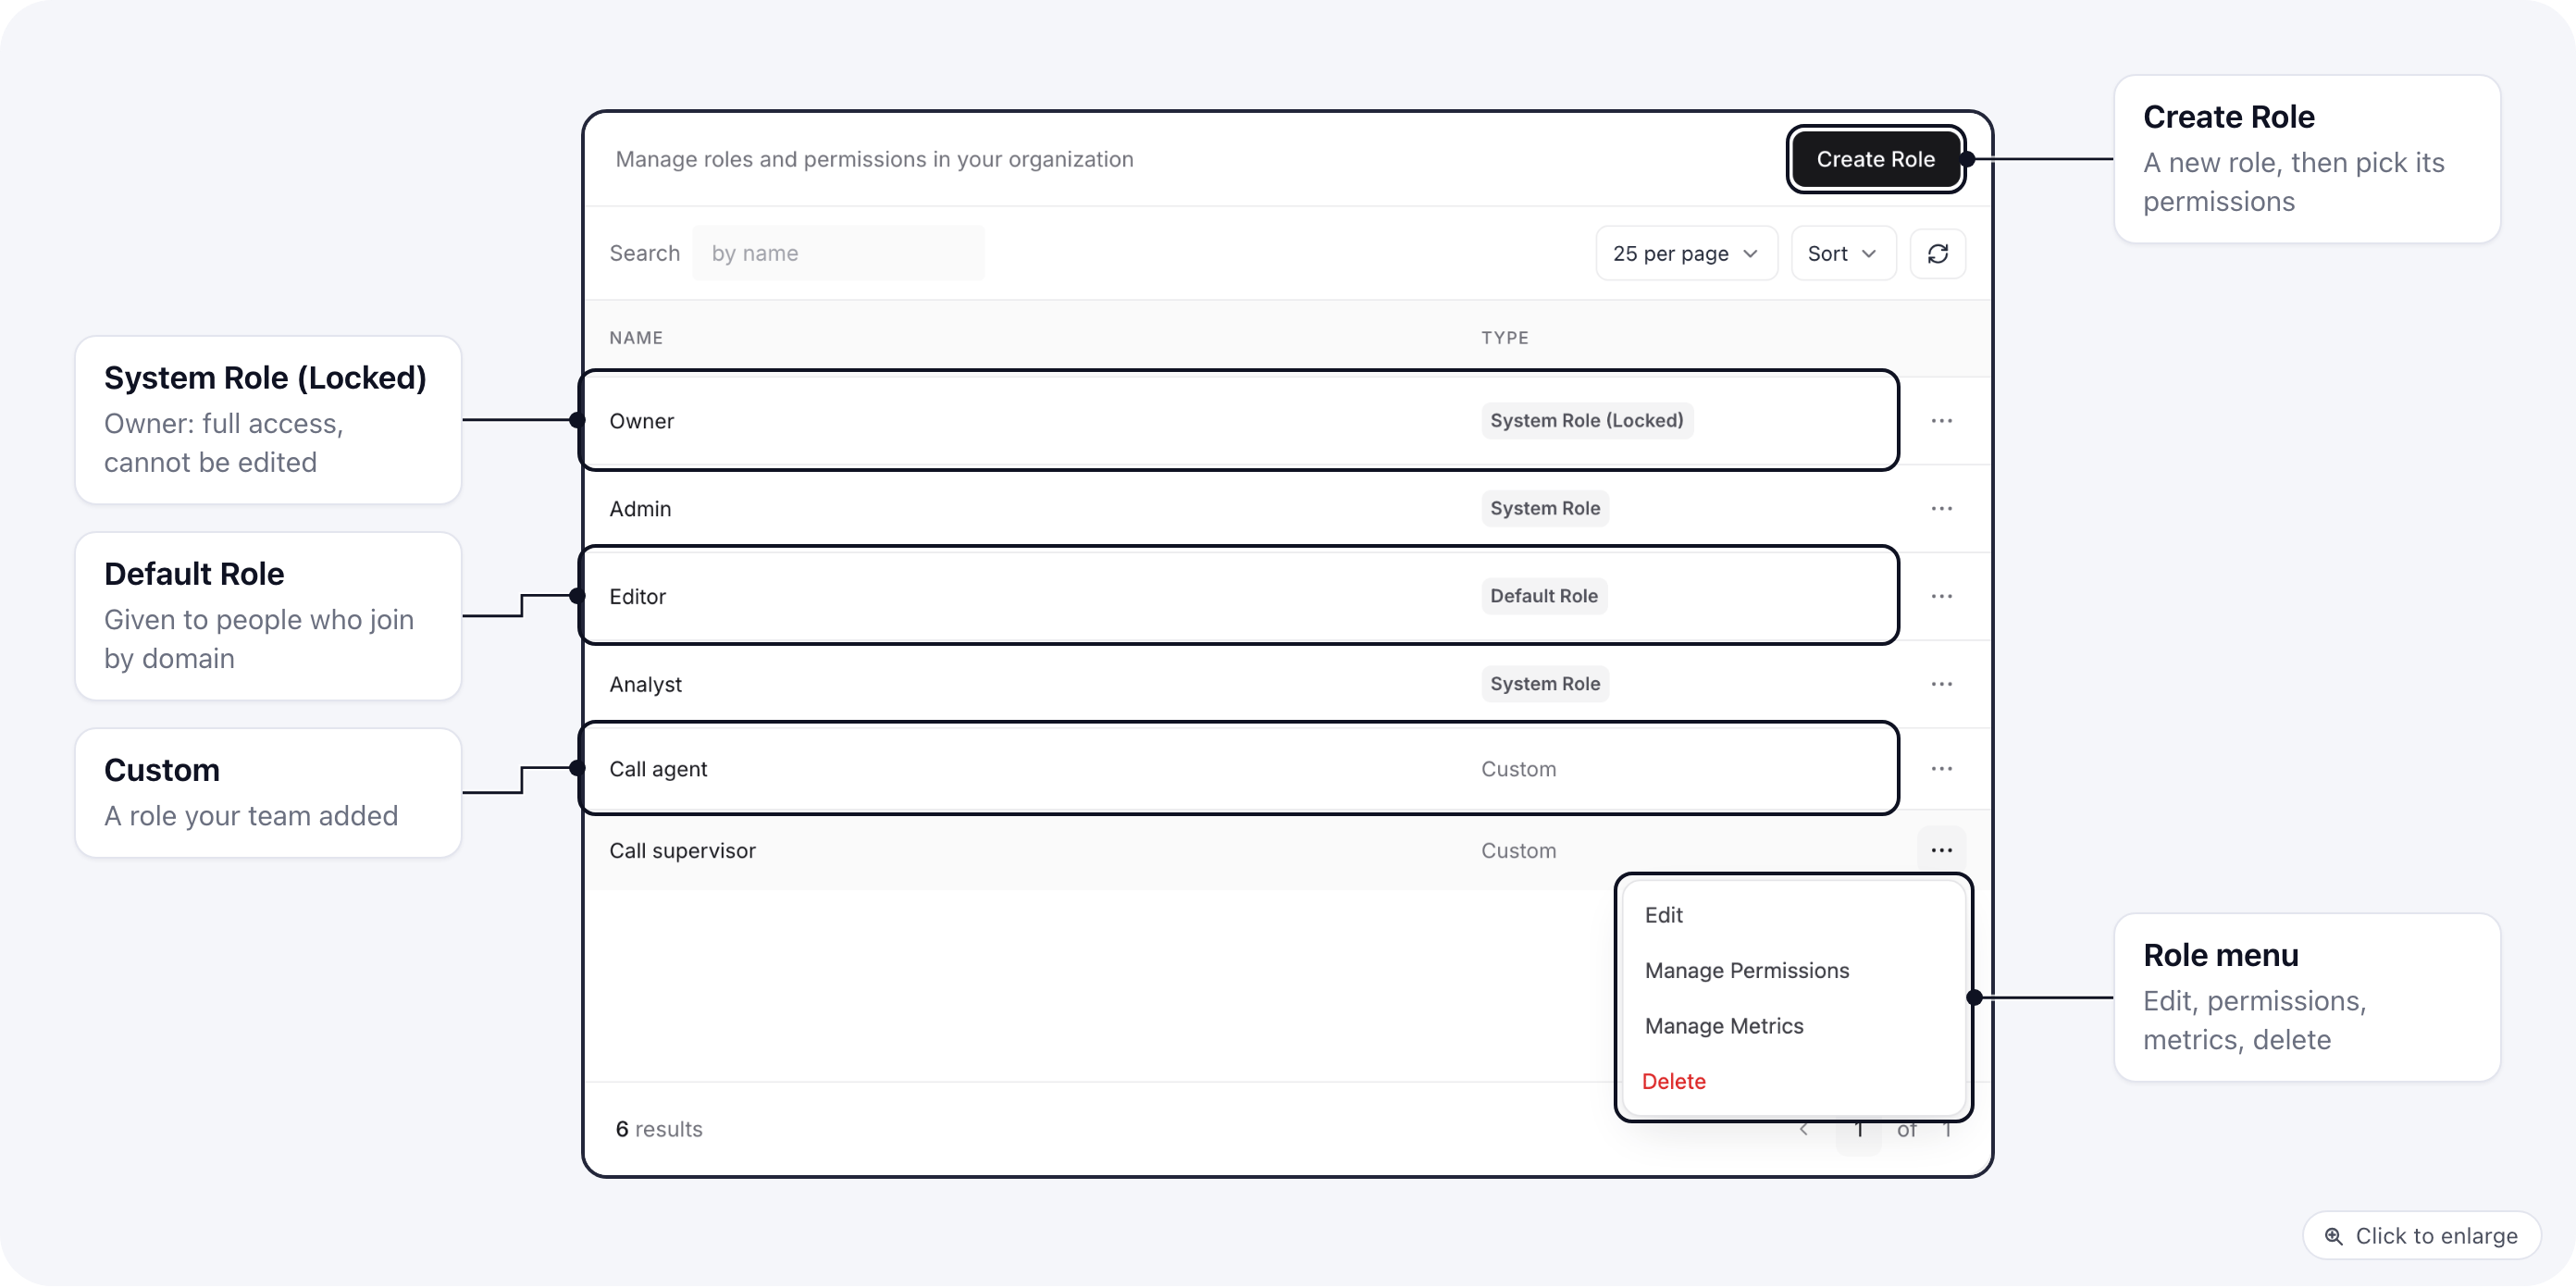
Each row’s menu has Edit (rename), Manage Permissions, Manage Metrics and Delete.
The built-in roles
New organizations start with these roles:
You can change any of them except Owner. Your changes apply to everyone who has the role.
Create a role
- Open Settings > Roles and click Create Role.
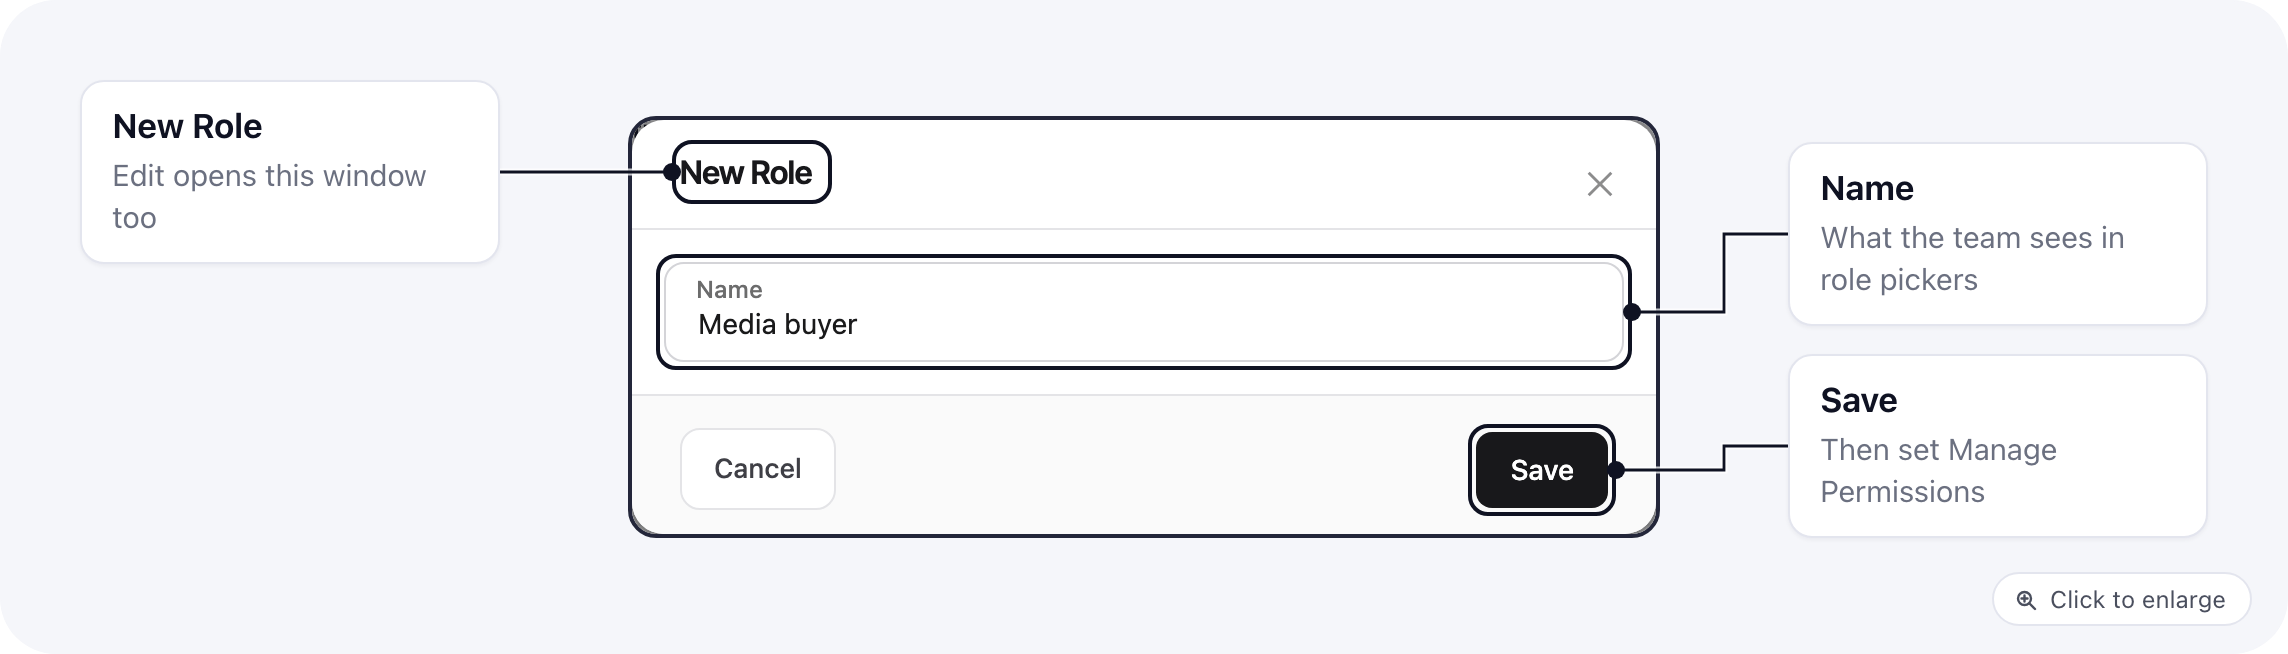
- Enter a Name, for example “Finance”.
- Under Start from a preset, pick one of the presets below, or Blank role to start with nothing ticked. A preset fills in permissions and metrics. Use Edit permissions and Edit metrics under the list to change them before you save.
- Click Save.
- To change the role later, open its menu and pick Manage Permissions or Manage Metrics.
Role presets
When you create a role you can start from a preset and adjust it, instead of ticking every box yourself. A preset only fills in the new role. Changing presets later does not touch roles you already made.Update on Conversions also allows refunds, so the Support and Fulfillment presets can refund an order. Remove that box if the person should not. The Read-only preset gets no Export boxes, but the app does not yet check Export everywhere, so treat exported data as visible to anyone who can view the list.
Manage Permissions
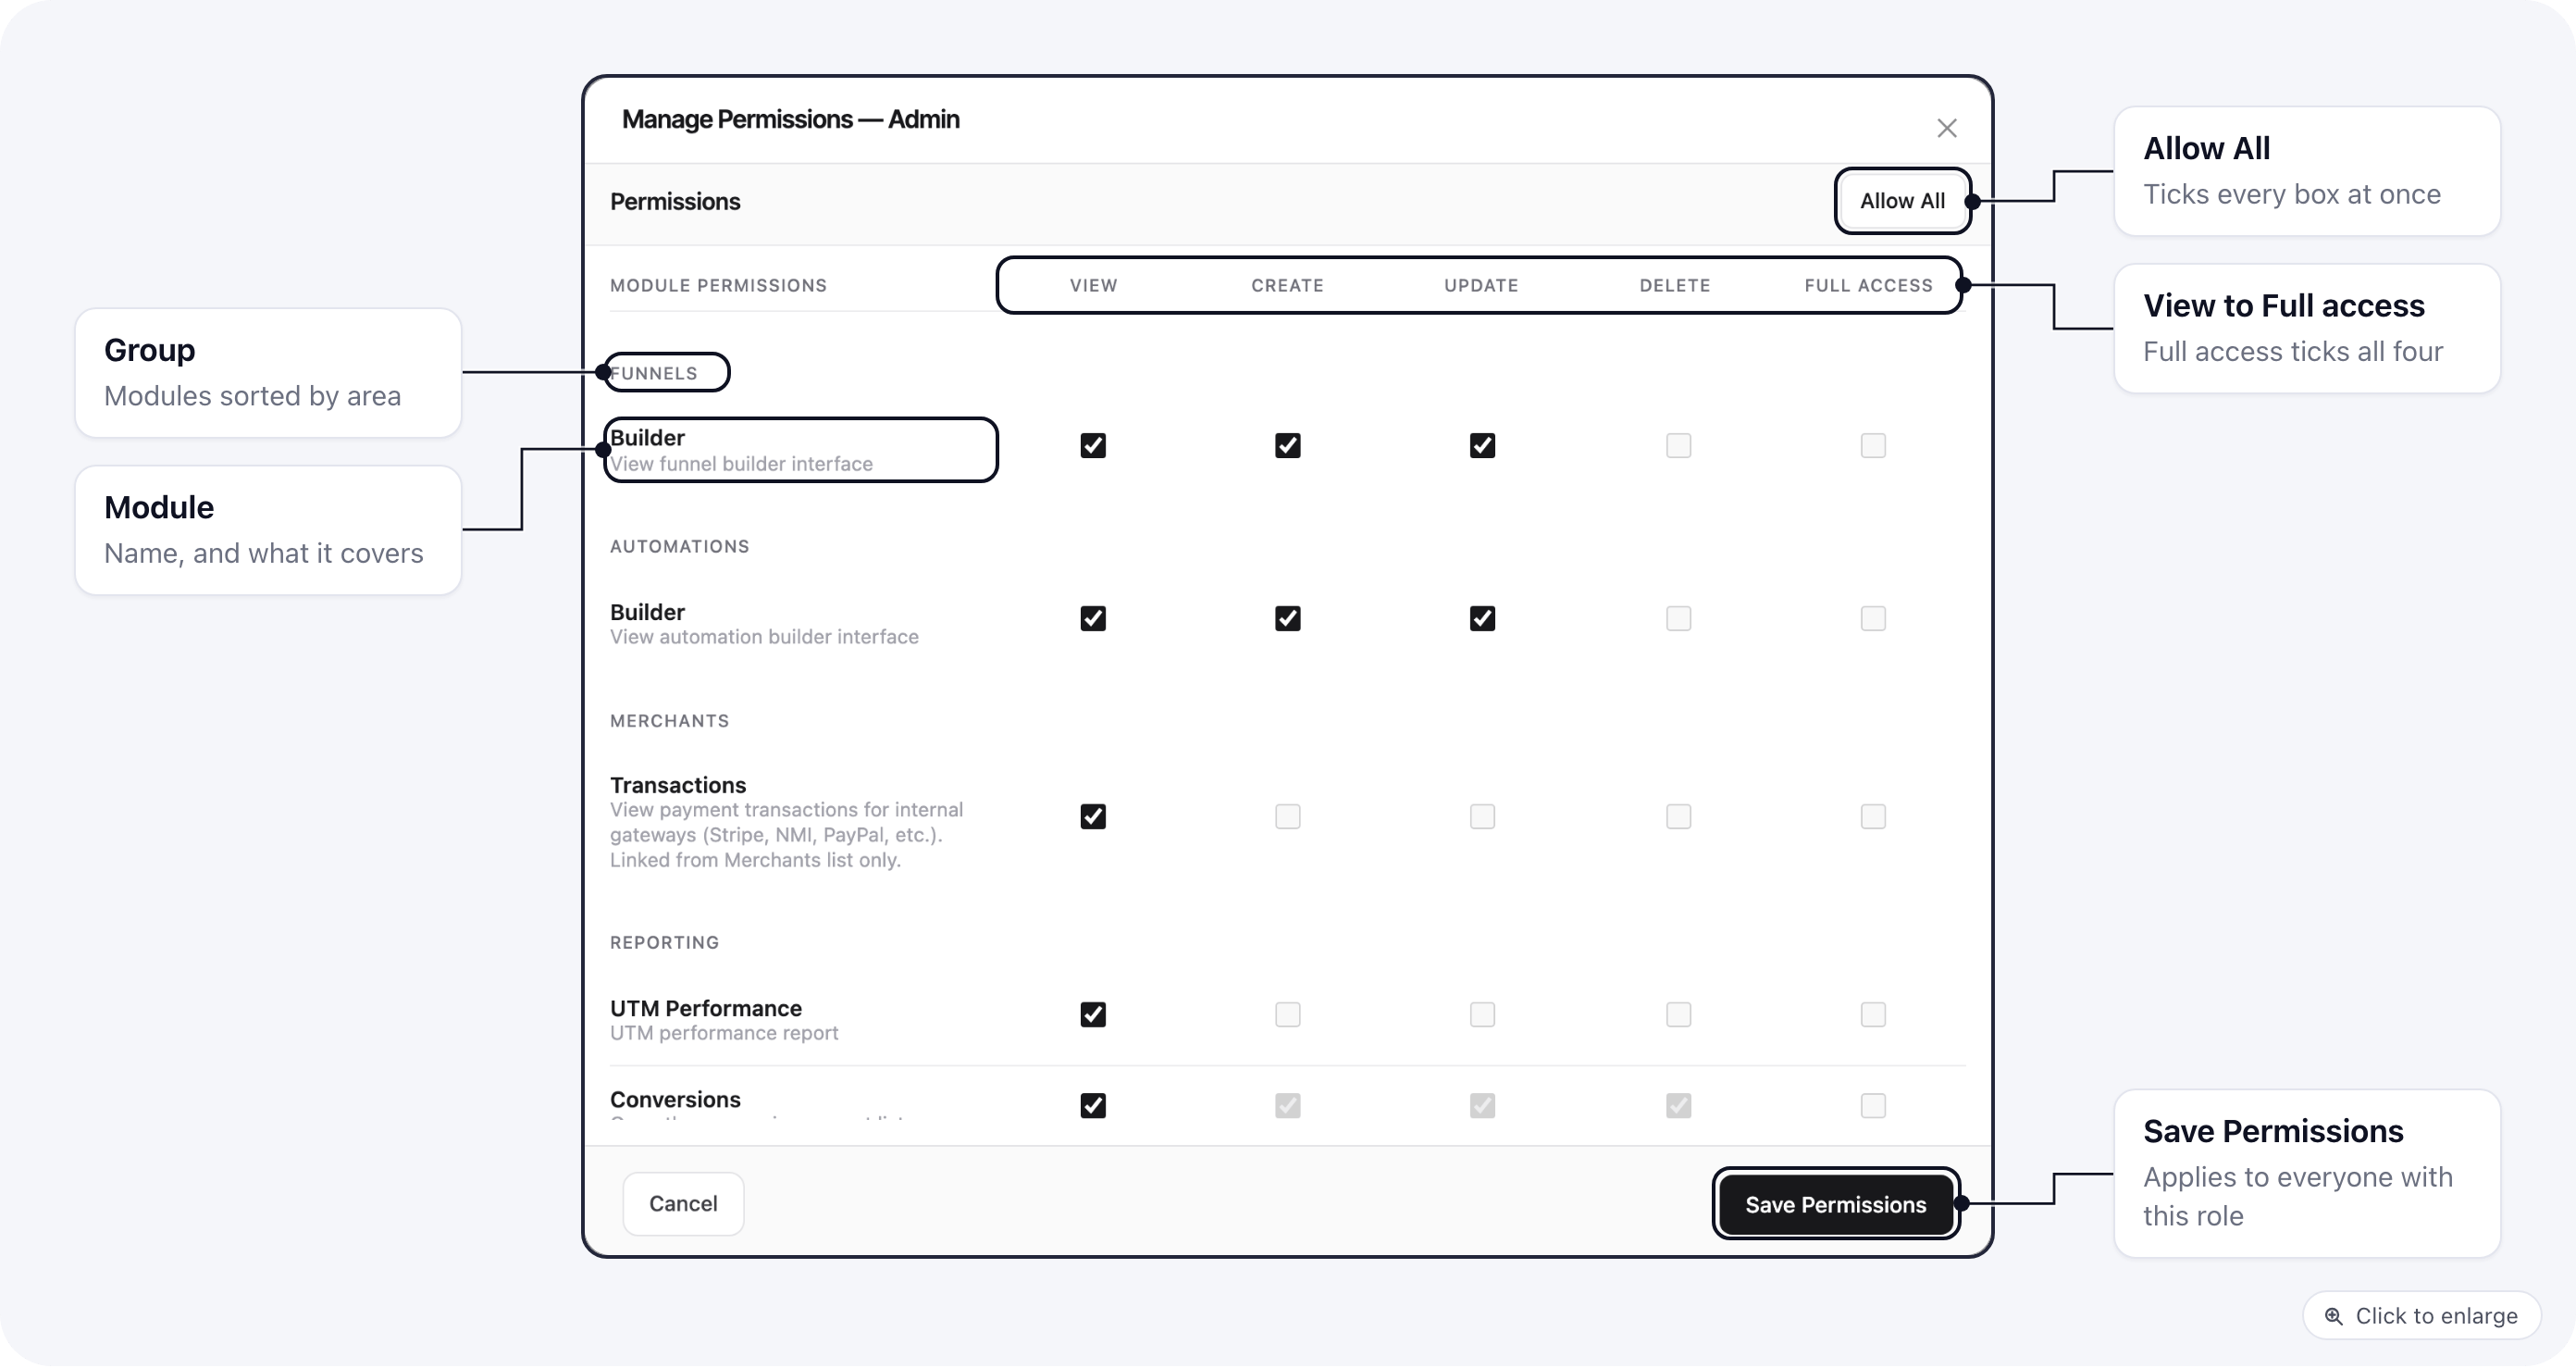
- Rows are areas of the app, such as Pages, Products or Customers, each with a one-line description. Rows that belong together sit under a heading: Affiliates, Funnels, Automations, Merchants, Reporting, Billing, Organization and Call Center.
- View lets the person open the area and see its lists. Create adds new items, Update changes existing ones, Delete removes them.
- Full Access ticks View, Create, Update and Delete for that row in one click.
- A greyed-out box means that action does not exist for the row. Logs, for example, only has View.
- Allow All at the top gives the role every permission. Click it again (it then reads Remove All) to clear the grid.
Manage Metrics
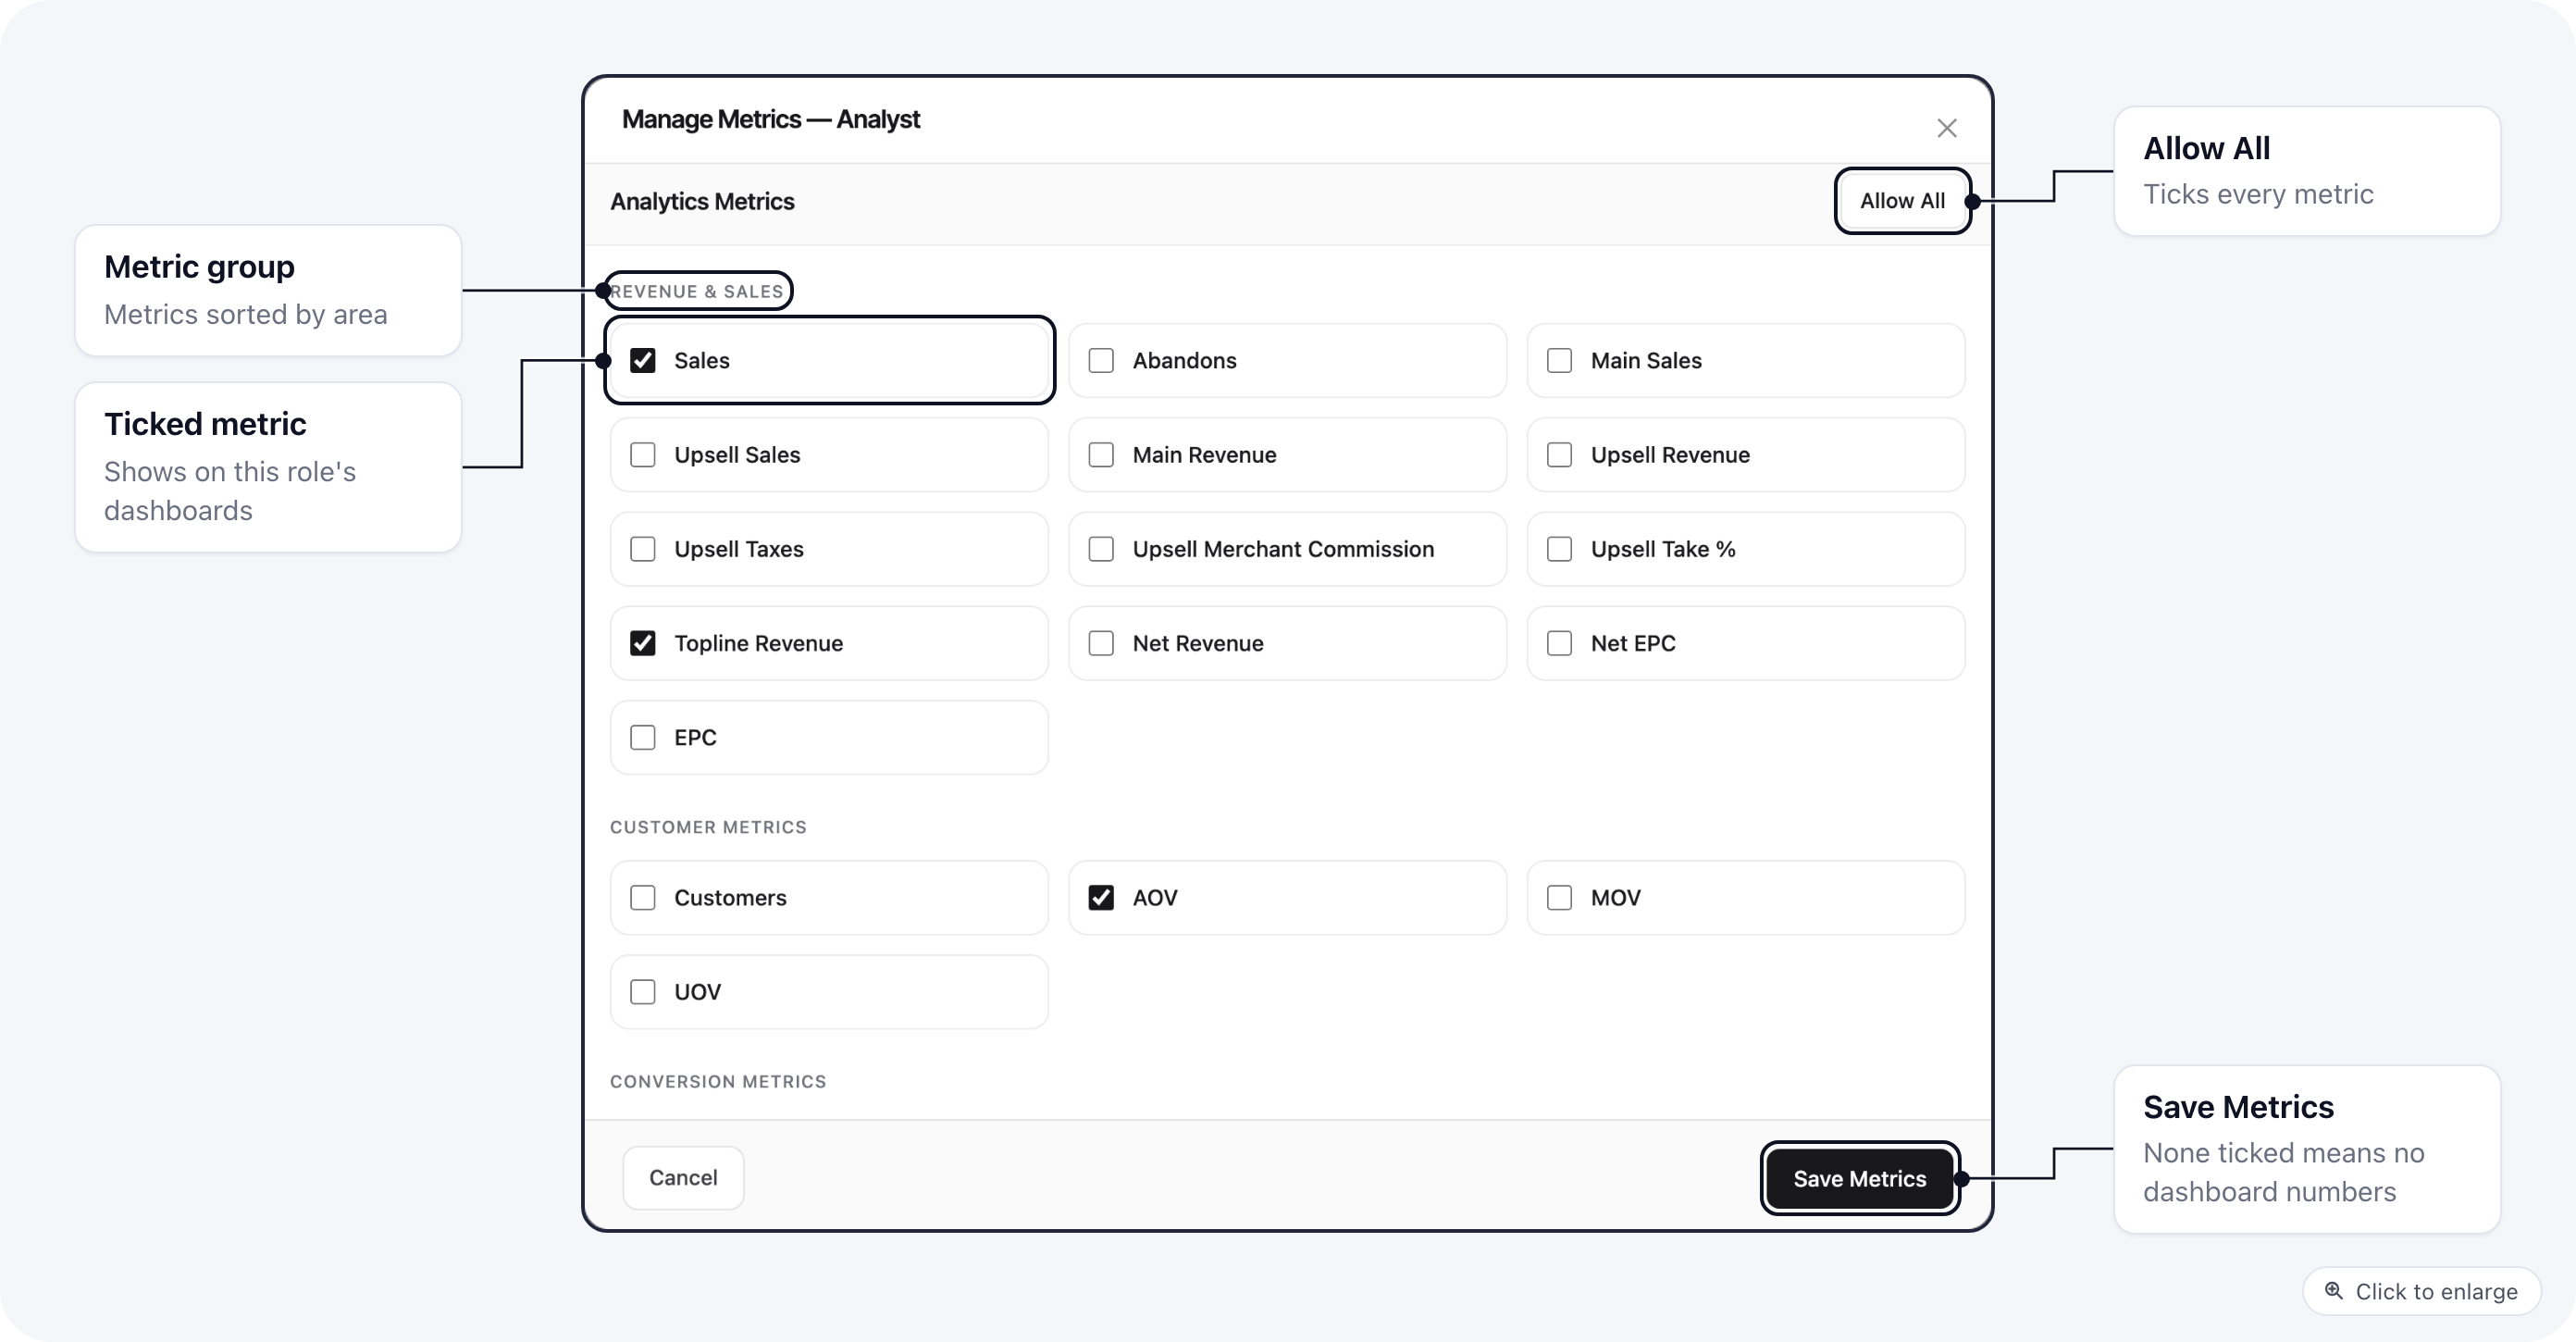
- Tick each metric the role may see. Metrics are grouped, for example Revenue & Sales, Refund Metrics, Profitability Metrics, Cost Metrics, Advertising Metrics and Fulfillment Metrics.
- Allow All gives every metric, including ones added later.
- A role with no metrics sees no dashboard numbers at all: no metric grid, no metric cards and no metrics table.
What happens when you change a role
When you save a role’s permissions or metrics, everyone who holds that role gets the change right away, on every brand where they have it. A person who has a different role on one brand keeps it there.Delete a role
Pick Delete in the role’s menu and confirm. Owner, Admin, Editor and Analyst cannot be deleted. Move everyone off a role before you delete it: the people who still have it lose its permissions, and this cannot be undone.Give someone Billing
Billing is the organization’s plan, payment cards and invoices. Neither Admin nor any other built-in role except Owner includes it, which is why a teammate set to Admin does not see Billing in their settings menu.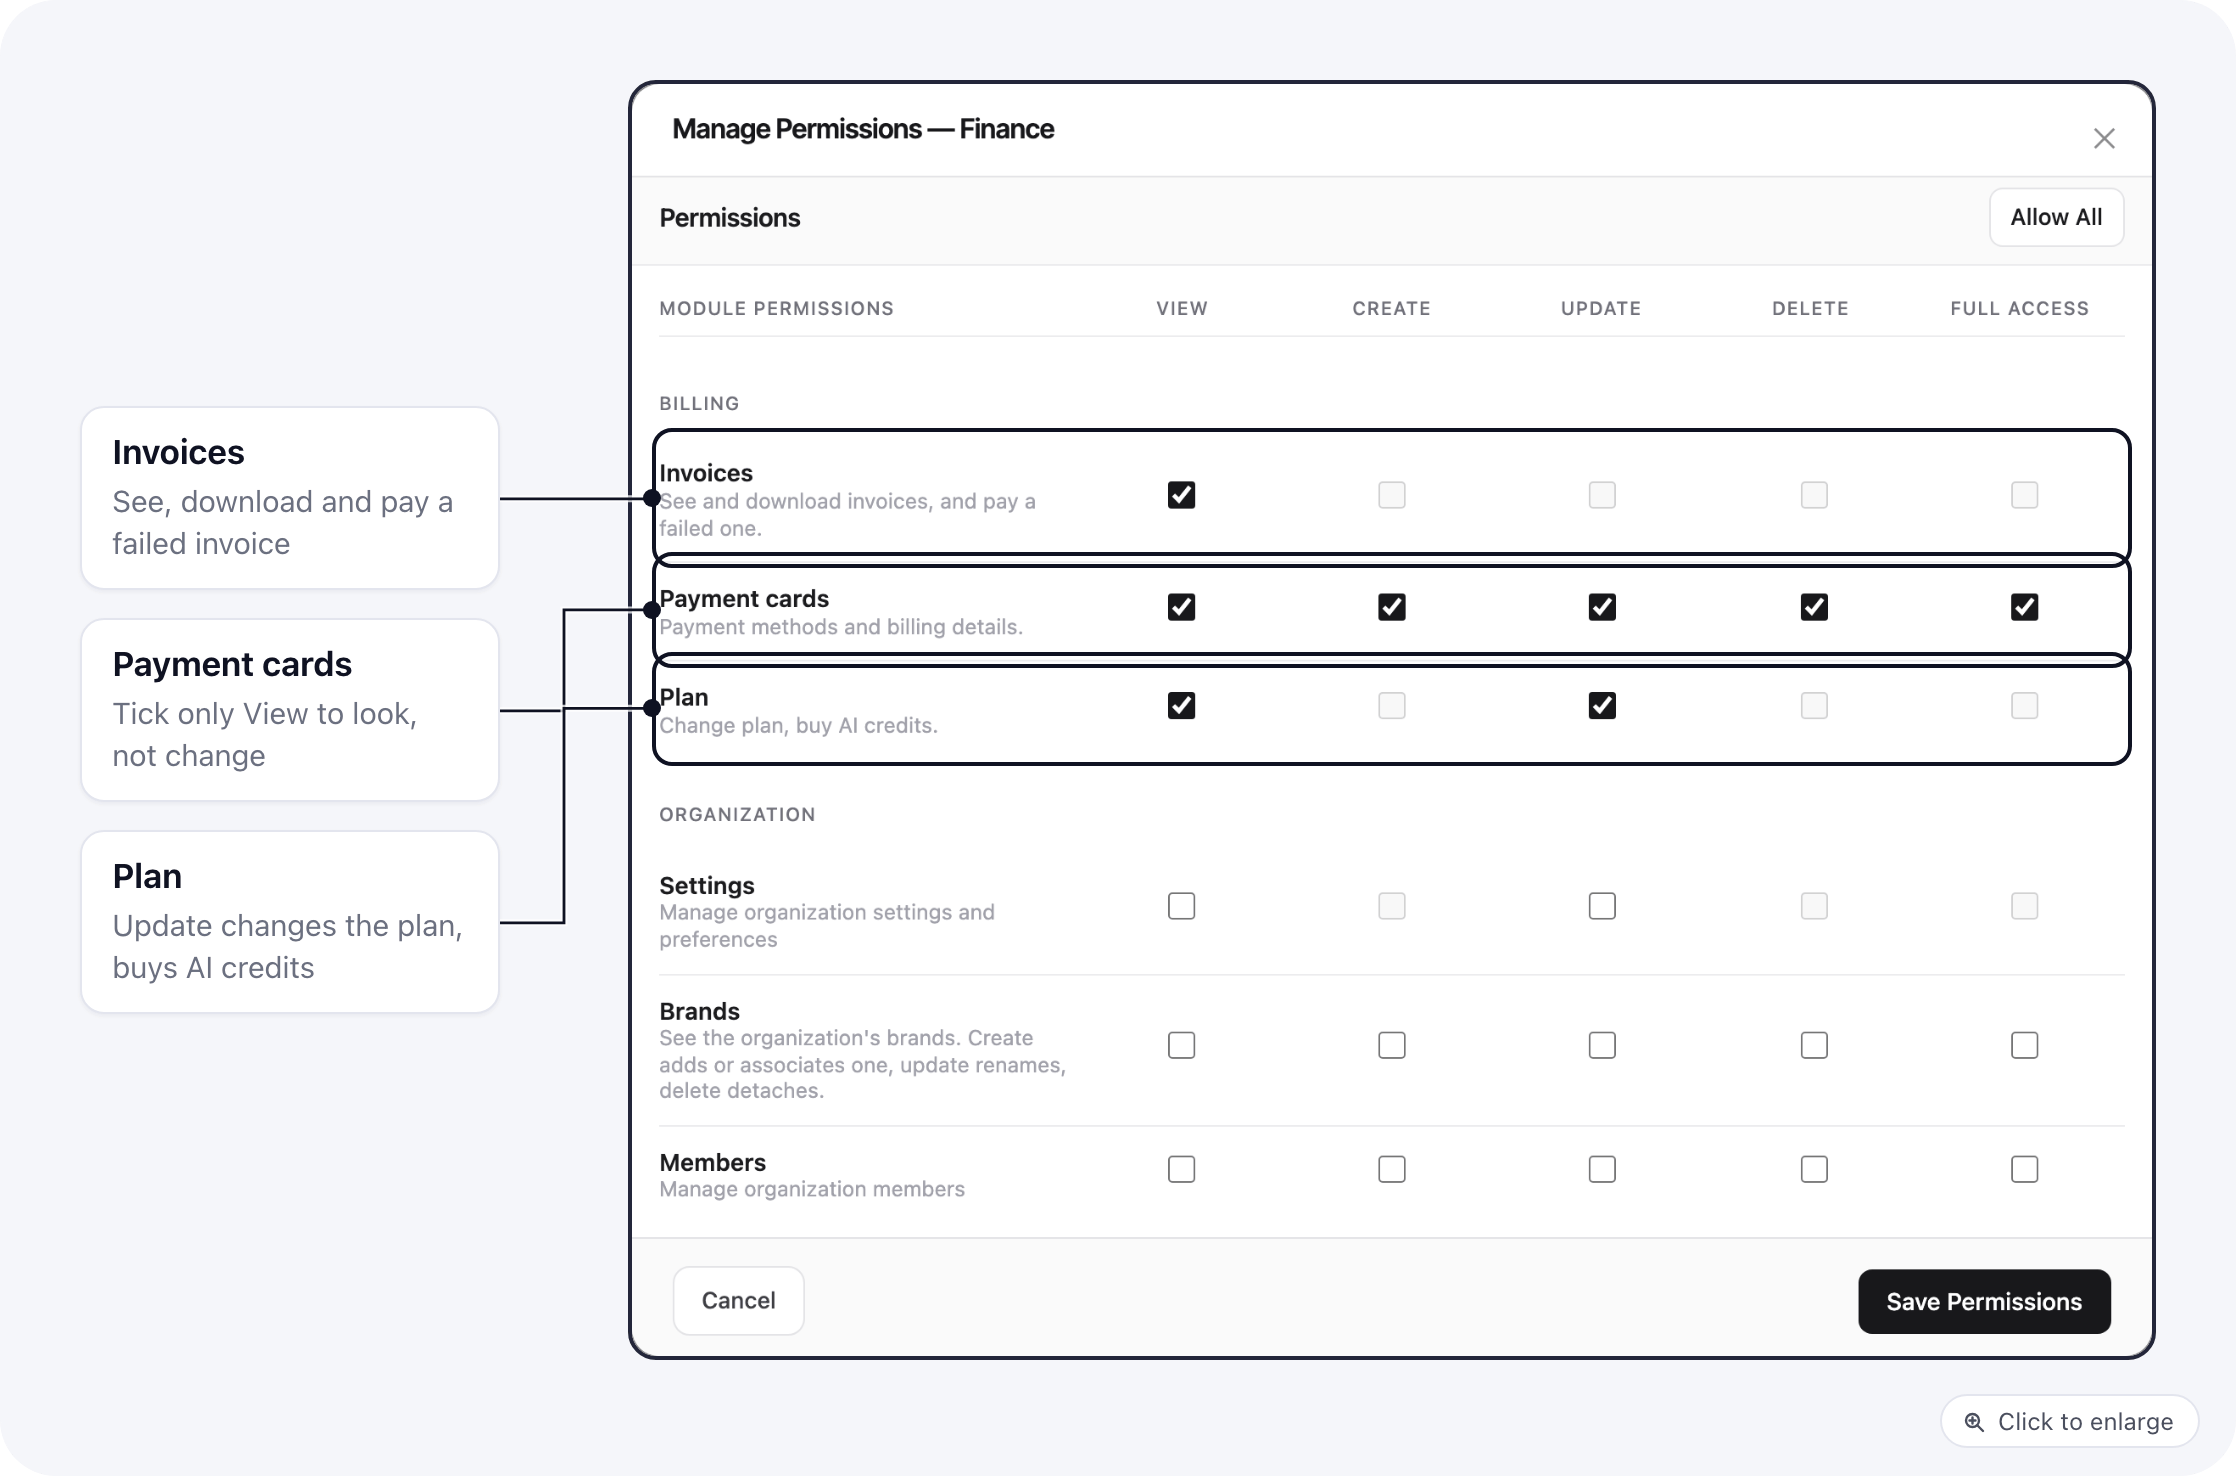
Invoices View also lets the person pay a failed invoice with Pay now.
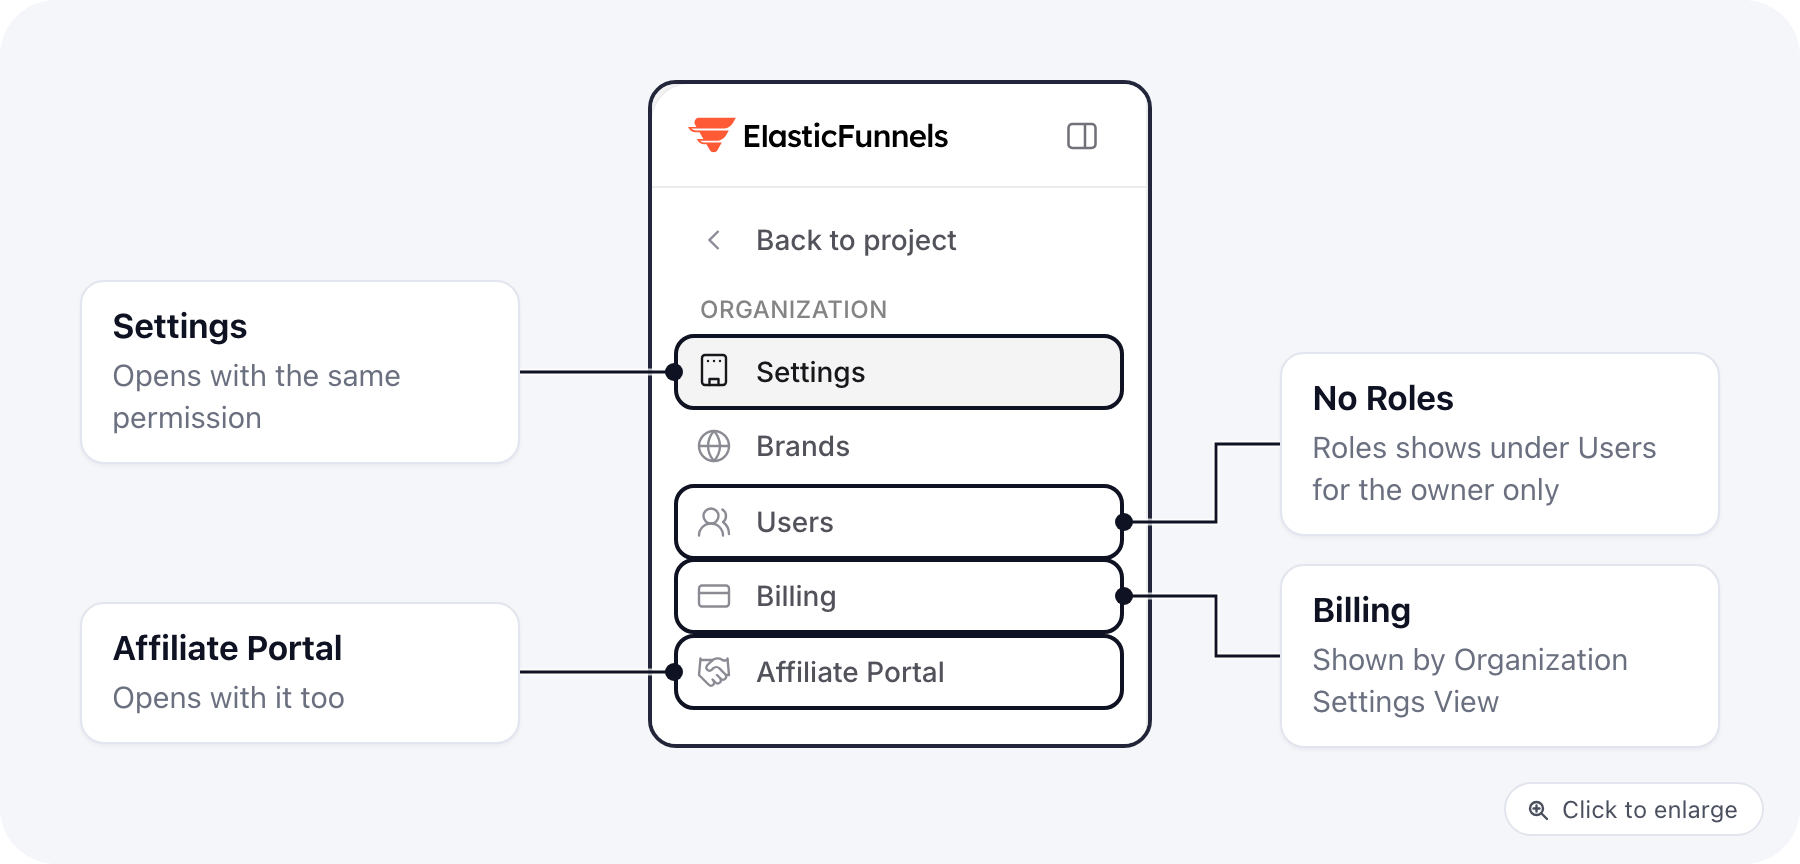
Organization > Settings also grants Billing: View to see it, Update to change cards and the plan. It opens the organization Settings page as well, so use the Billing rows when the person should only handle billing. The quickest way is the Finance preset in Create Role.
Once saved, the person sees Billing in their settings menu.
Worked examples
Each example is a custom role. Create it, then tick the boxes listed. Leave every other box empty.Finance: billing and revenue numbers, no page editing
For a bookkeeper or finance lead who pays the bills and reads the numbers. Permissions- Billing: everything in Give someone Billing.
- Reporting > Conversions: View. Reporting > Subscriptions: View. Reporting > Customers: View.
- Merchants > Transactions: View, if they reconcile payments with your gateway.
- No Pages, Funnels, Page Components or Templates boxes, so they cannot open or edit pages.
- Revenue & Sales: Topline Revenue, Net Revenue, Sales, Main Revenue, Upsell Revenue.
- Refund Metrics: Refund Total, Refund %.
- Profitability Metrics: Profit, Profit %.
- Cost Metrics: COGS, Platform Fees, Taxes Collected, Fulfillment Cost.
Support: customers and orders
For someone who answers customers and looks up their orders. Permissions- Customers: View.
- Conversions: View.
- Tickets: View, Create, Update, if you use Tickets.
Fulfillment ops
For someone who ships orders and fixes fulfillment problems. Permissions- Conversions: View, Update. View opens the fulfillment list; Update allows the actions on orders.
- Products: View, so they can check what each product contains.
- Integrations: View, only if they should see how your fulfillment provider is connected.
- Fulfillment Metrics: Orders with Tracking, Total Fulfillment Cost, Avg Fulfillment Cost, Reconciliation Rate.
Media buyer or analyst: reports and metrics only
For someone who reads traffic and ad results but changes nothing. Permissions- Tracking: View.
- Reporting > UTM Performance, Clicks, Campaigns, Conversions: View.
- Custom Reports: View. Add Create and Update if they should build their own reports.
- Advertising Metrics: Ads: Spend, Ads: Clicks, Ads: CPC, Ads: CPA, Ads: CTR.
- Revenue & Sales: Topline Revenue, Sales, EPC.
- Conversion Metrics: Conversion Rate.
- Efficiency Metrics: Revenue Per Click, Profit Per Click.
- Session Analytics and Page Analytics: Sessions, Page Views.
Test a role before you roll it out
Invite a test address with the new role and one brand, sign in as that user, and check the sidebar, a list they should open, a page they should not reach, and the dashboard numbers. Then give the role to the real team.Related
- Organization users: invite people and pick their brands.
- Permission matrix: which permission each capability needs.
- Restricted role troubleshooting: when someone sees too much or too little.