
Who can manage users
A few limits apply to everyone who is not an owner:
- They cannot change or remove an owner or an admin.
- They cannot give anyone the Owner or Admin role, or any role that has every permission.
- They cannot invite someone as an admin.
The users list
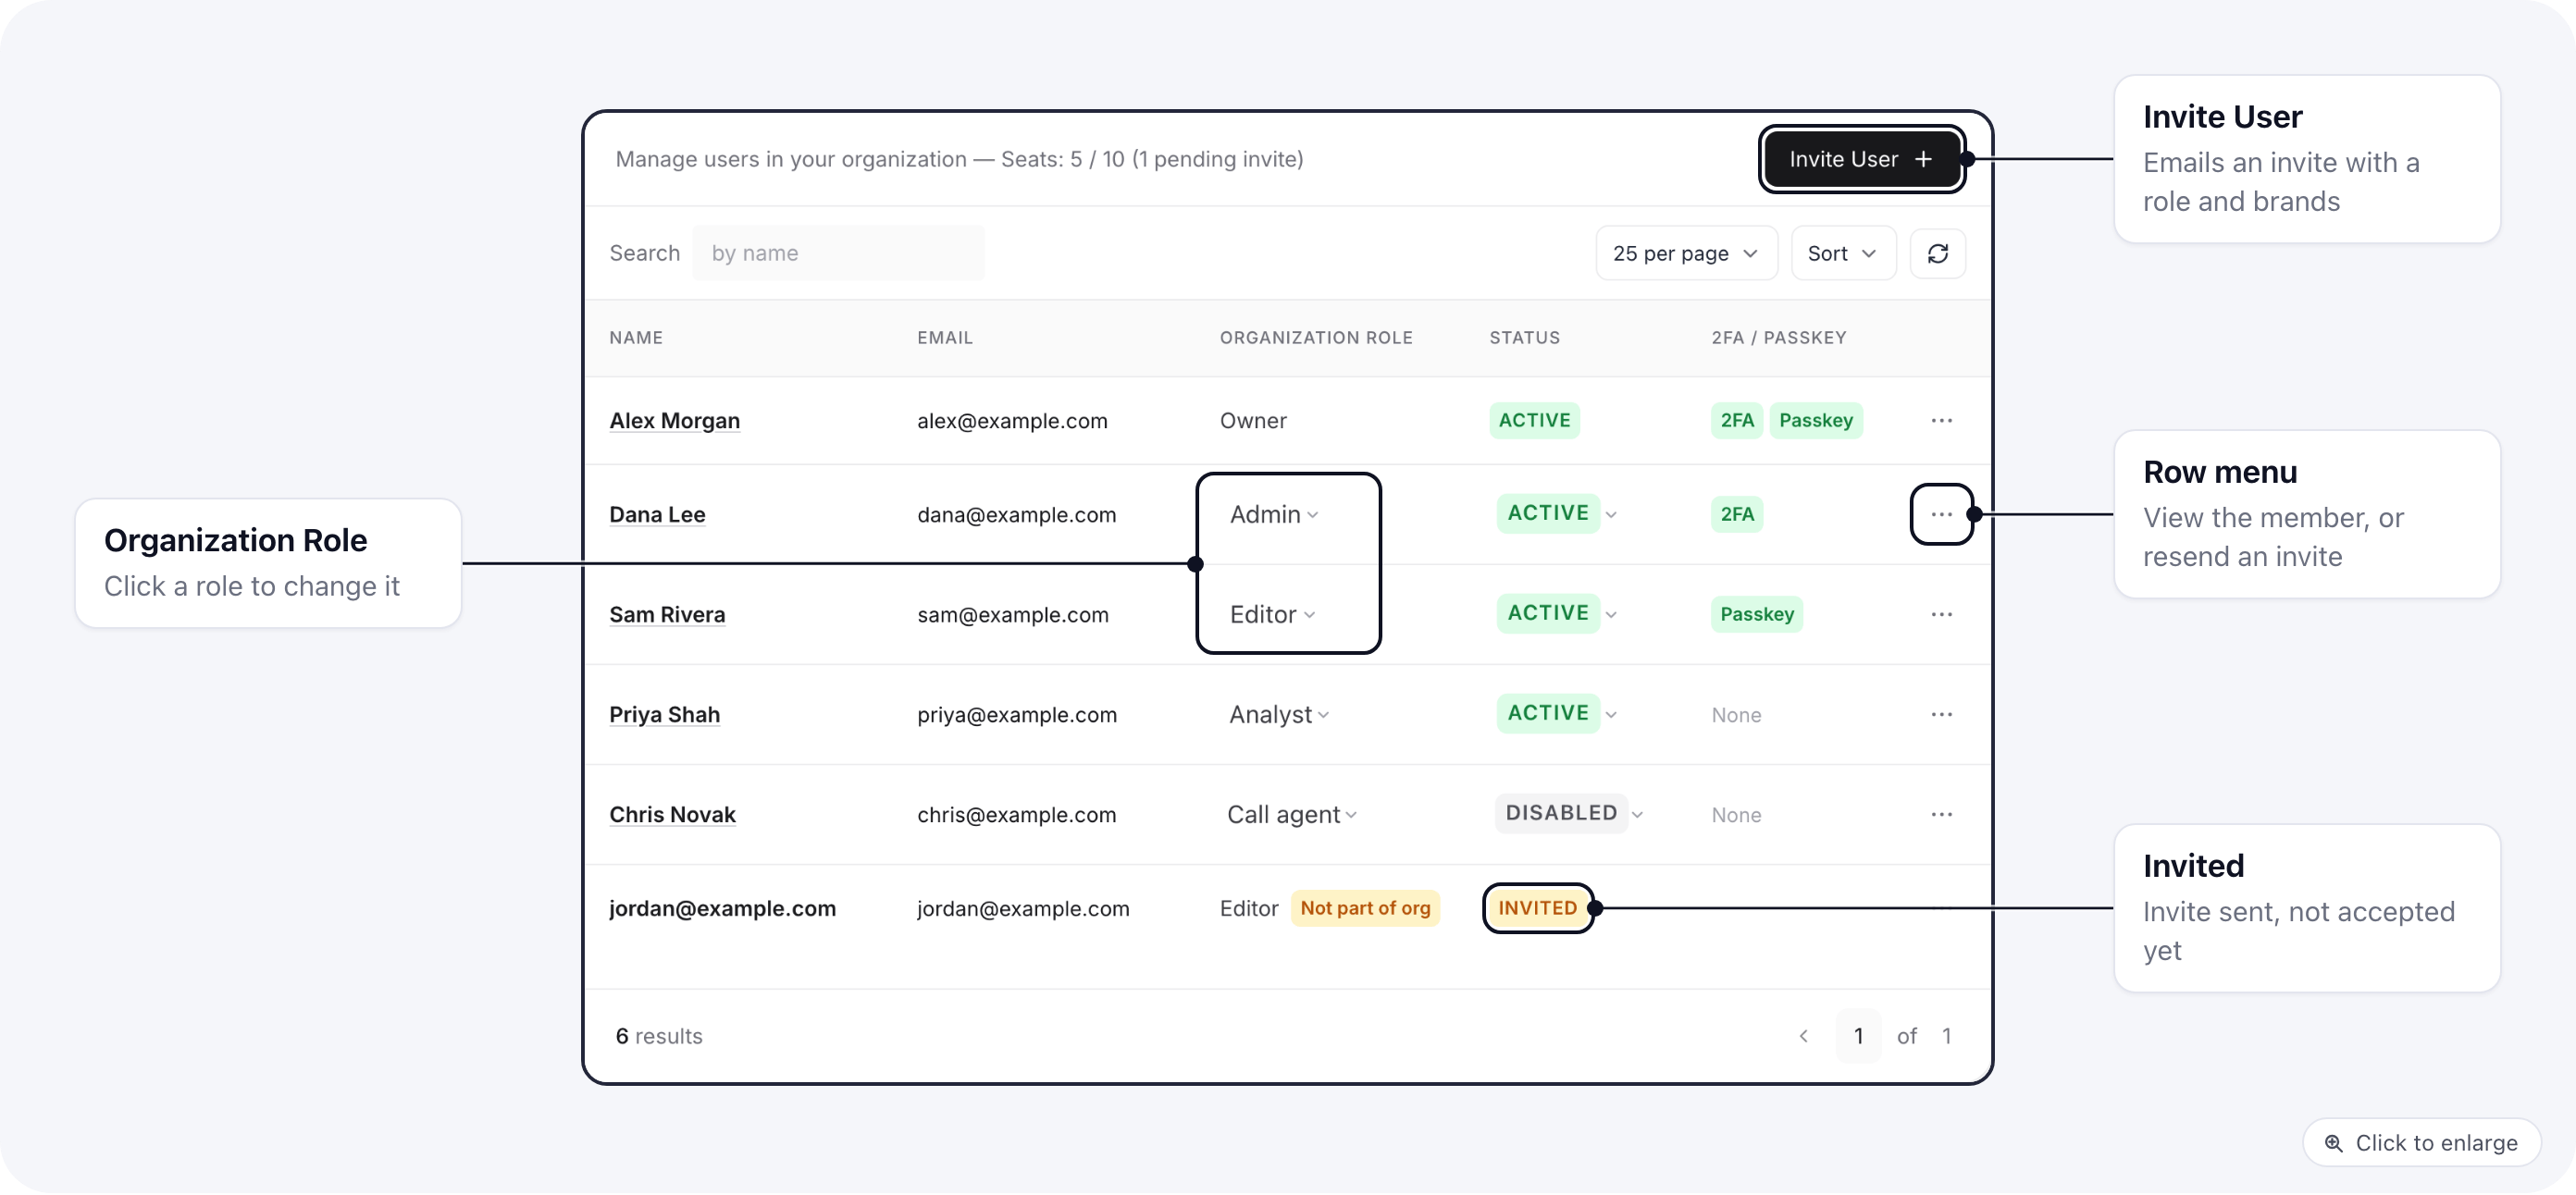
Invite a user
- Open Settings > Users and click Invite User.
- Enter their Email Address.
- Pick a Role. This becomes their organization role and their role on every brand you tick.
- Under Assign to Brands, tick at least one brand.
- Click Send Invite.
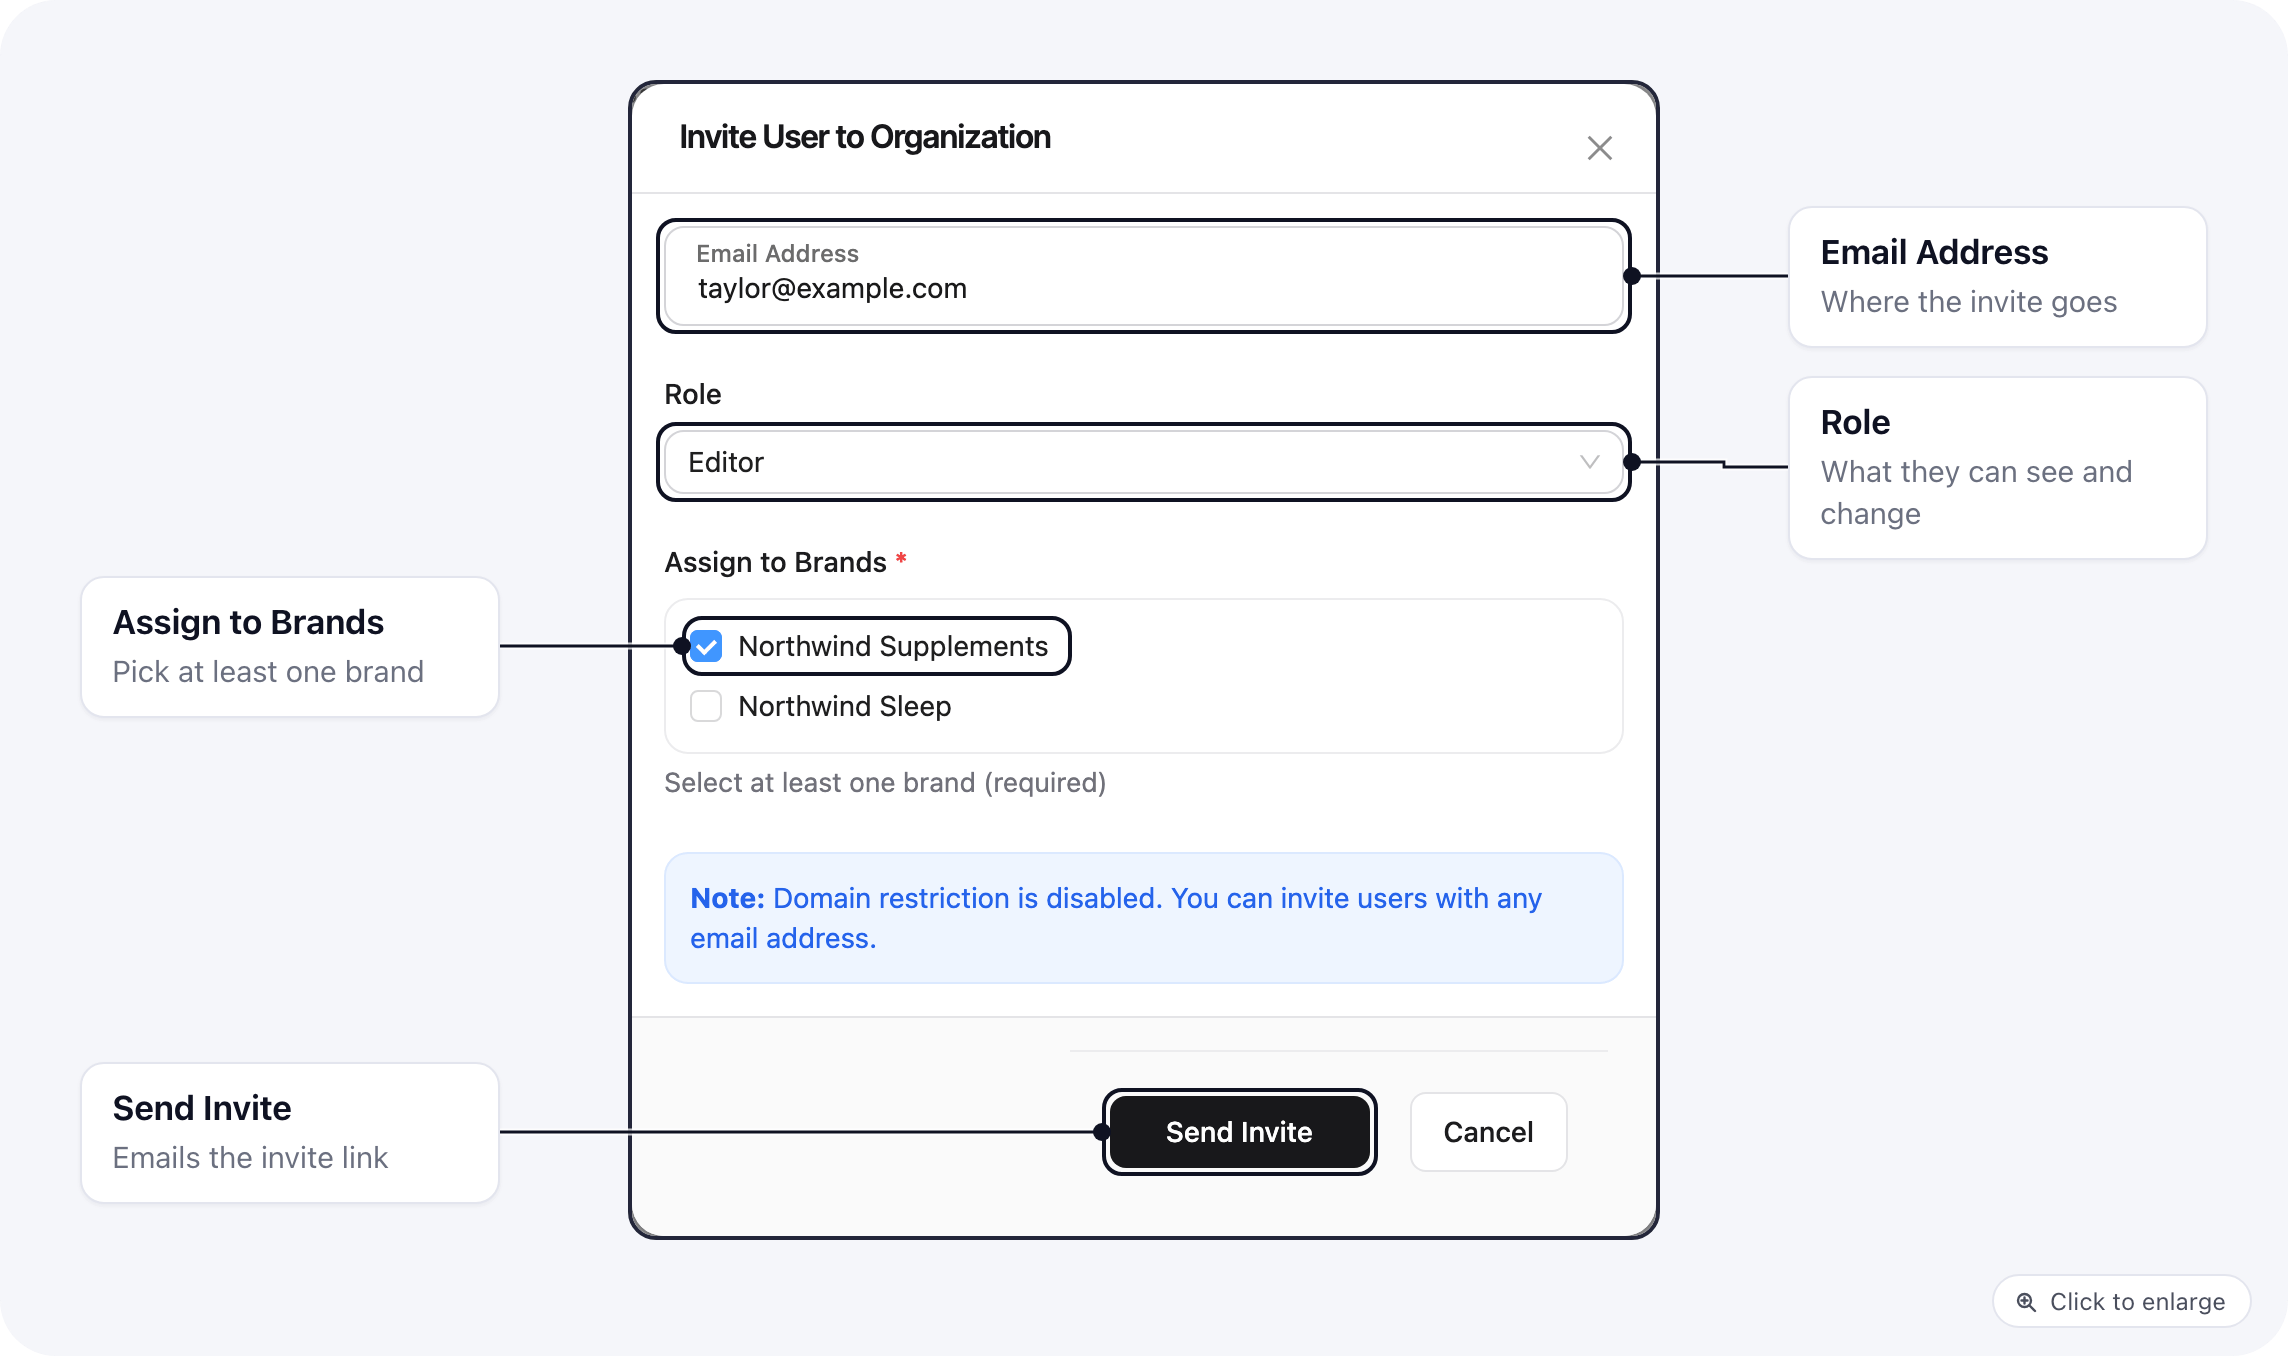
An invitation can never make someone an owner. Invite them with another role, then an owner changes their role to Owner from the list.
What the invitee sees
The invitee gets an email inviting them to join your organization, with a button to accept.- New to ElasticFunnels: the link opens a page where they enter their name and a password (at least 8 characters), then accept.
- Already has an account: they log in with the invited email address first, then open the link again. A different logged-in account cannot accept it.
Change a user’s role
In the list, click the role in the Organization Role column and pick a new one.Brand access and a role per brand
Open the user’s page and go to Brands and roles.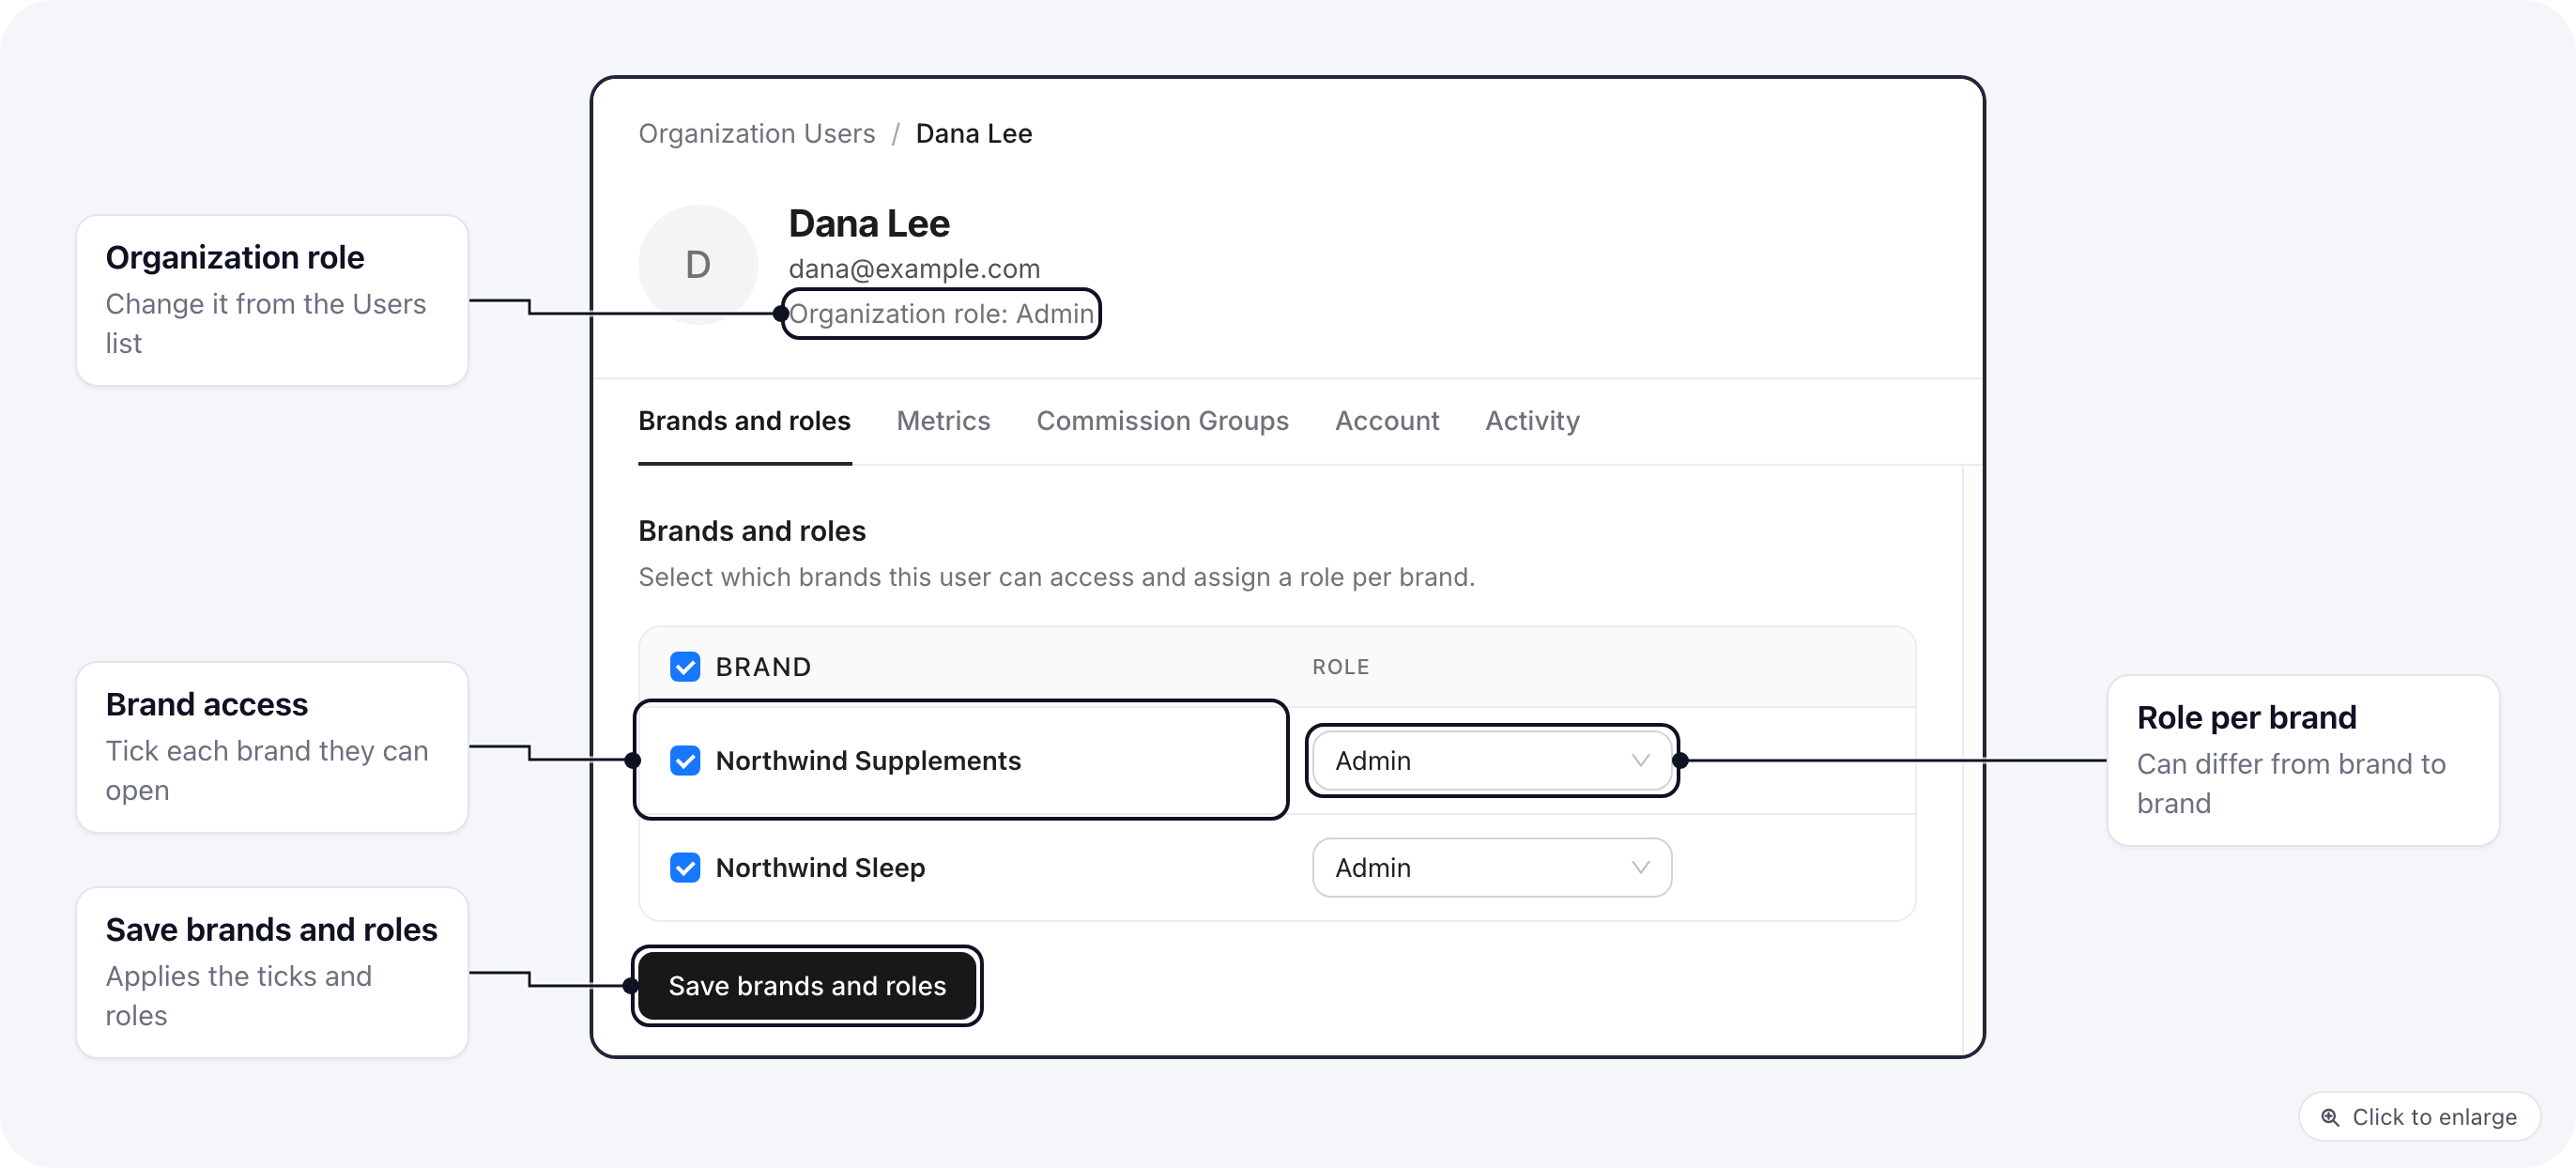
- Tick the brands they should reach. Untick a brand to take it away.
- For each ticked brand, pick the role they have there. Someone can be an Editor on one brand and an Analyst on another.
- Click Save brands and roles.
Custom metrics for one person
The Metrics tab on the user’s page sets which analytics numbers this person sees across all their brands, whatever their role says. Tick the metrics, or use Allow All, then click Save metrics. See Manage Metrics for what the metrics control.Pause or remove a user
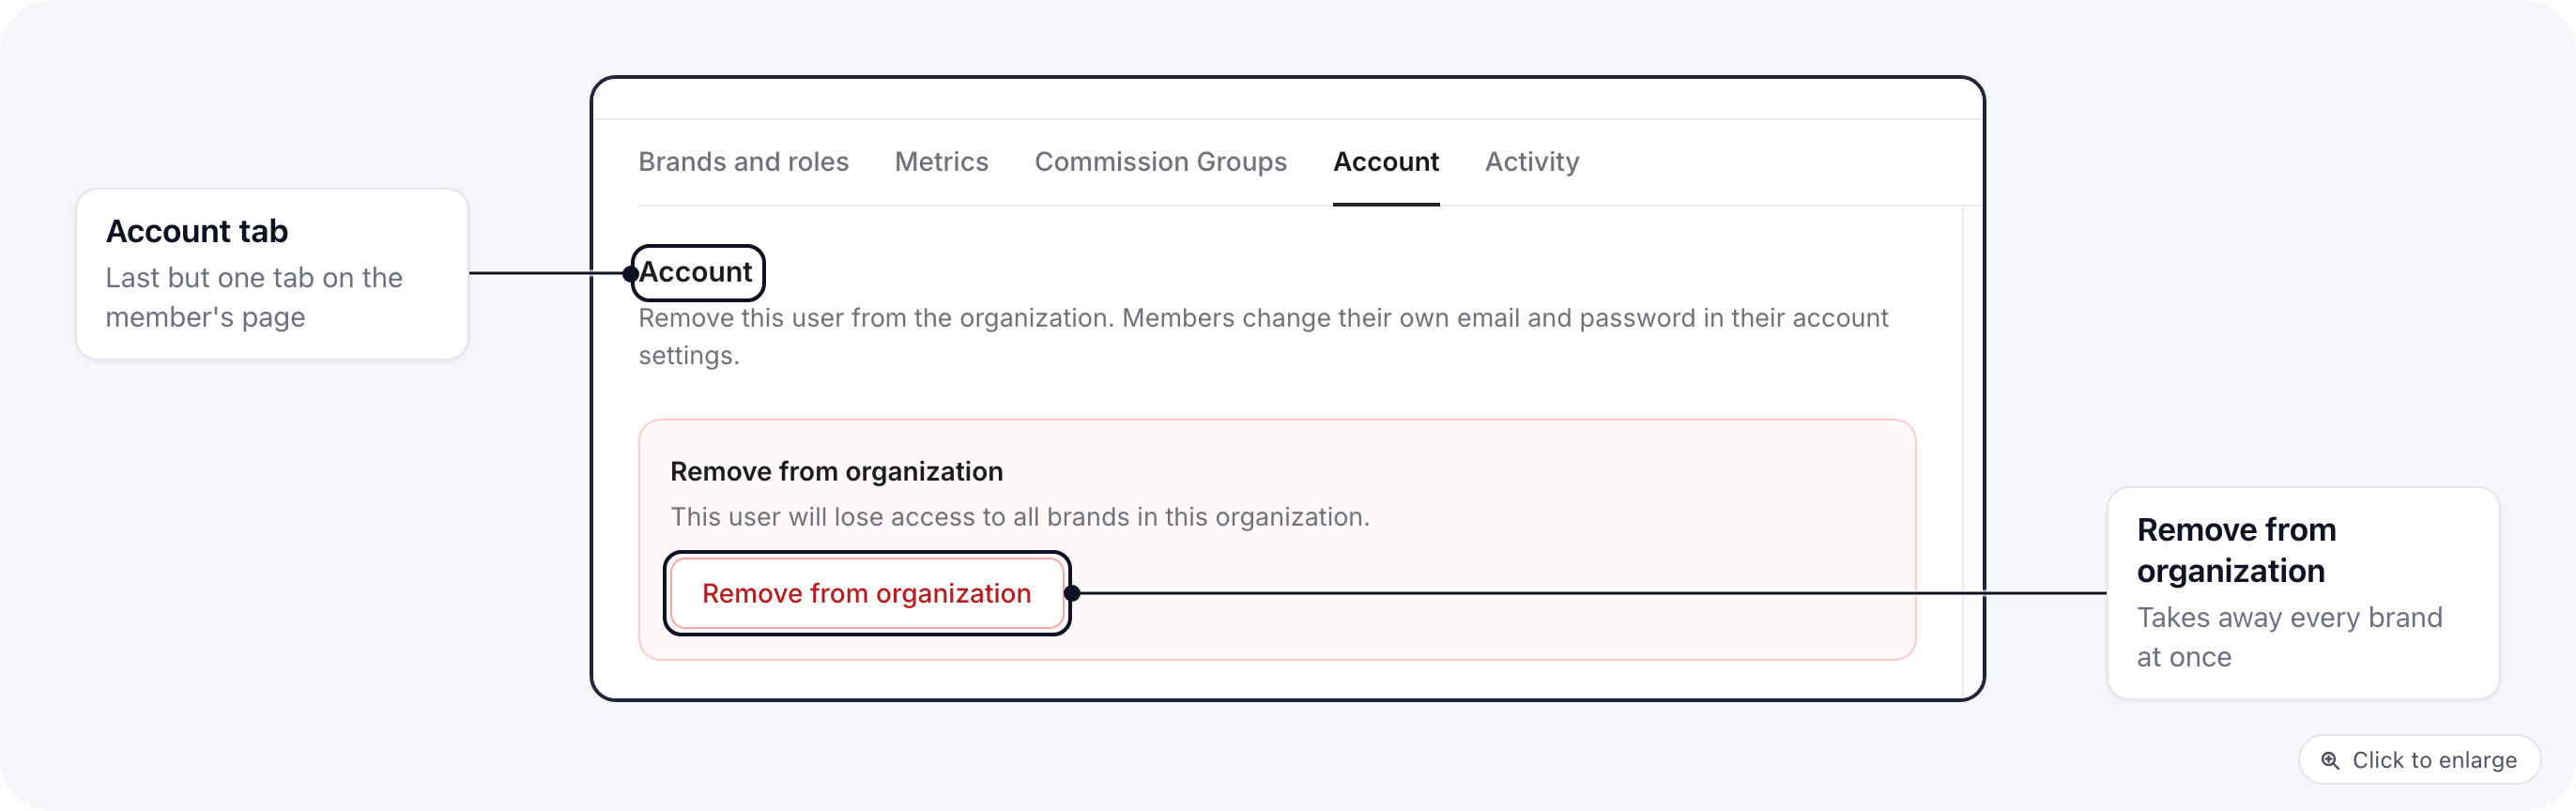
- Pause: in the list, click their status and pick Disabled. They keep their role and brands but cannot open the organization or its brands until you set them back to Active.
- Remove: open their user page, go to Account and click Remove from organization. They lose access to every brand in the organization, and their open sessions are signed out. Owners cannot be removed this way, and you cannot remove yourself.
Related
- Organization roles: built-in roles, creating your own, and worked examples.
- Roles, permissions, and metrics: how access is decided.
- Restricted role troubleshooting: when someone sees too much or too little.